

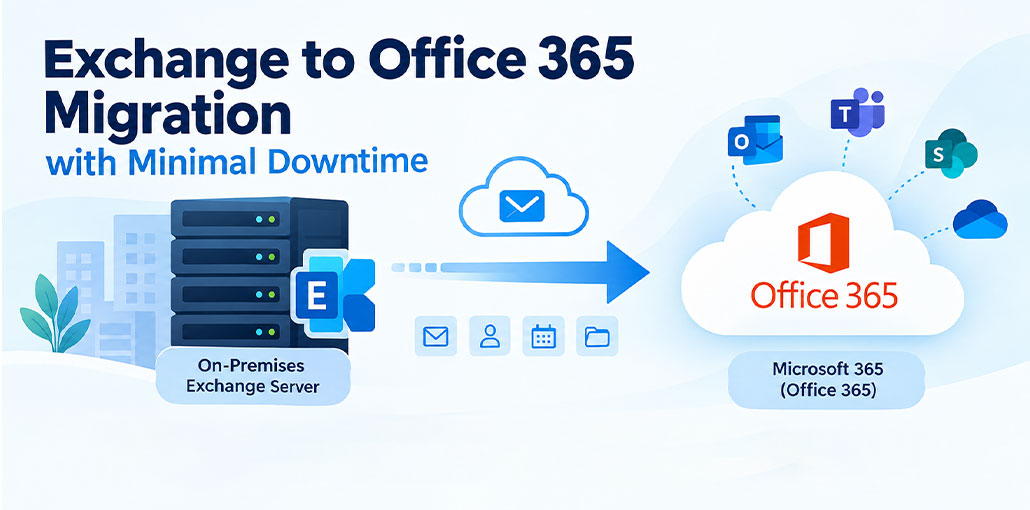
Moving from an on-premises Exchange Server to Microsoft 365 can help organizations cut down on infrastructure management make administration easier and use the cloud-based productivity tools that Microsoft offers. Moving hundreds or even thousands of mailboxes can be hard especially when email is essential for daily work.
A planned migration might lead to long periods of downtime failed mailbox moves and other issues. However, with planning a step-by-step approach and the right tools it’s possible to move Exchange mailboxes to Office 365 with minimal disruption.
What Should You Think About Before Moving from Exchange to Office 365?
Before starting the migration IT staff should take a look at the existing Exchange setup and the Microsoft 365 environment. These points will matter a lot during the analysis:
- Exchange server version: Know which version of Exchange server you are using.
- Mailbox count: Find out how many user mailboxes, shared mailboxes and other types of mailboxes need to be moved.
- Mailbox size: Migrate large mailboxes to Office 365 with proper planning, as they may take longer to transfer and can affect overall migration performance.
- Microsoft 365 licenses: Make sure each user has the Microsoft 365 license and enough storage space.
- Network capacity: The speed and stability of your network connection play a role in how fast the migration goes.
- Permissions: Confirm that the right administrative permissions are, in place to access both the source and destination mailboxes.
- Data requirements: Identify calendars, contacts, tasks, archives and other mailbox data that needs to be retained.
- Migration timeline: Establish a realistic schedule based on mailbox count, data volume and business requirements.
Creating an inventory before migration helps identify problems before they affect users.
Also read: How to Import PST to Office 365 or Microsoft 365?
Choose the Right Exchange to Office 365 Migration Method
Microsoft provides approaches for moving Exchange data to Microsoft 365. The appropriate method depends on the organization’s Exchange environment, mailbox count and migration requirements.
Cutover Migration
A cutover migration moves all mailboxes to Microsoft 365 within a relatively short migration window. It can work well for environments but may be less practical for organizations with large numbers of mailboxes.
Staged Migration
Staged migration allows organizations to move users in batches. This can reduce the impact on business operations. Provide more control over the migration process.
Hybrid Migration
A hybrid deployment allows on-premises Exchange and Microsoft 365 to coexist during the transition. It can help organizations that need a longer migration period, but it requires additional planning and configuration.
Third-Party Migration Tools
Third-party migration software can help organizations with more automation and centralized migration management. Depending on the tool features may include mailbox mapping, incremental migration, batch processing, reporting and migration prioritization.
How to Prepare for the Migration
Preparation is one of the most important factors in reducing downtime.
1. Audit the Existing Exchange Environment
Create an inventory of all mailboxes. Identify inactive accounts, oversized mailboxes, shared mailboxes and archive data.
2. Prepare Microsoft 365
Create the required Microsoft 365 users and assign licenses. Verify that the destination environment is ready before moving production data.
3. Verify Permissions and Authentication
Check permissions and authentication requirements on both the Exchange Server and Microsoft 365 sides. Authentication or permission problems can prevent mailbox migration jobs from starting
4. Clean Up Unnecessary Data
Review unnecessary mailbox data before migration. Reducing the amount of data that needs to be transferred can help shorten migration times.
5. Test Connectivity
Verify connectivity between the Exchange environment and Microsoft 365. Resolve network, firewall, authentication or service configuration issues before starting the production migration.
6. Run a Pilot Migration
of migrating every mailbox immediately select a small group of users for testing. This allows the IT team to identify configuration or data-related issues before the larger migration begins.
How to Migrate Exchange to Office 365 with Minimal Downtime?
Once the environment is prepared the migration can be performed in controlled stages.
Start with a Pilot Group
Move several mailboxes first and verify that email, calendars, contacts and other required data are available in Microsoft 365.
Migrate Mailboxes in Batches
than moving every mailbox simultaneously divide users into manageable migration batches. This makes it easier to monitor progress and troubleshoot issues.
Use Incremental Migration Where Available
An incremental approach can help reduce the amount of data that needs to be transferred during the cutover. Initial data can be moved beforehand followed by changes made since the migration pass.
Prioritize Critical Users
Organizations can migrate departments or users according to business priorities. For example IT teams may choose to migrate critical users first before moving executive or business-critical mailboxes.
Perform the Final Cutover Carefully
Once the majority of mailbox data has been transferred and validated perform the synchronization and update mail-flow or DNS settings as required. The goal is to keep the transition window as short as possible.
Monitor the Environment After Migration
After the cutover verify mailbox access, email delivery, calendars, contacts, permissions and other important functionality. Migration reports can also help identify failed or skipped items that require attention.
Also read: Top 6 Data Migration Tools: Which One Is Right for You?
Using a Third Party Exchange Migration Tool
For organizations that want an alternative to managing the migration through native Exchange and Microsoft 365 tools, an Exchange migration tool can simplify several parts of the process.
Stellar Migrator for Exchange is designed to migrate mailboxes between Exchange Server and Microsoft 365. It provides features such as mailbox mapping, incremental migration, priority-based migration parallel migration and detailed migration reporting.
For example, an organization can perform the mailbox transfer before the final cutover and then synchronize subsequent changes. This approach can help reduce the amount of work required during the transition window.
A third-party tool can be particularly useful when administrators need control over multiple migration batches or want to reduce their dependence on complex PowerShell-based workflows.
Common Challenges During Exchange to Microsoft 365 Migration
With careful planning organizations may encounter several challenges.
Large Mailboxes
Large mailboxes require time and bandwidth to transfer. Organizations should identify mailboxes early and plan their migration batches accordingly.
Authentication and Permission Issues
Incorrect permissions or authentication configuration can prevent migration jobs from accessing source or destination mailboxes.
Network Limitations
Available bandwidth and network performance can affect migration speed especially when many mailboxes are transferred simultaneously.
Mail-Flow Problems
Incorrect DNS or mail-flow configuration during cutover can result in delayed or undelivered messages. DNS and mail-flow settings should therefore be carefully validated.
Failed or Skipped Items
Some migration jobs may encounter items that cannot be transferred. Detailed migration reports can help administrators identify and address these issues.
User Disruption
Users may experience access or synchronization issues during the final transition. A phased migration and clear communication plan can help minimize the impact.
Post-Migration Checklist
After completing the migration IT administrators should verify:
- All required mailboxes are accessible.
- New emails are being delivered correctly.
- Calendars and contacts are available.
- Shared mailbox access is working.
- Required permissions have been preserved.
- Migration reports have been reviewed.
- Failed or skipped items have been investigated.
- Users can access Outlook and Microsoft 365 services normally.
- Legacy Exchange infrastructure is not decommissioned until the migration has been fully validated.
Exchange to Office 365 Migration Checklist
Before Migration
- Audit Exchange mailboxes
- Review mailbox sizes and data
- Prepare Microsoft 365 accounts
- Assign licenses
- Verify permissions and authentication
- Test connectivity
- Create a migration schedule
During Migration
- Start with a pilot group
- Migrate users in batches
- Monitor migration progress
- Perform synchronization where applicable
- Validate migrated mailboxes
During Cutover
- Complete the final synchronization
- Update required DNS and mail-flow settings
- Confirm email delivery
- Communicate the transition to users
After Migration
- Verify mailbox data
- Review migration reports
- Resolve failed or skipped items
- Confirm user access
- Monitor the environment
- Decommission legacy infrastructure only after successful validation
Conclusion
Migrating from Exchange Server to Office 365 does not have to result in extended business disruption. The key is to treat migration as a planned process than a single large-scale data transfer.
By auditing the existing environment preparing Microsoft 365 in advance testing with a pilot group, migrating mailboxes in batches and using synchronization where appropriate organizations can significantly reduce the final cutover window.
For organizations looking for an alternative to managing the process through native tools and PowerShell, a dedicated Exchange migration tool such as Stellar Migrator, for Exchange can provide additional automation, mailbox mapping, migration scheduling and reporting capabilities.








Leave a comment