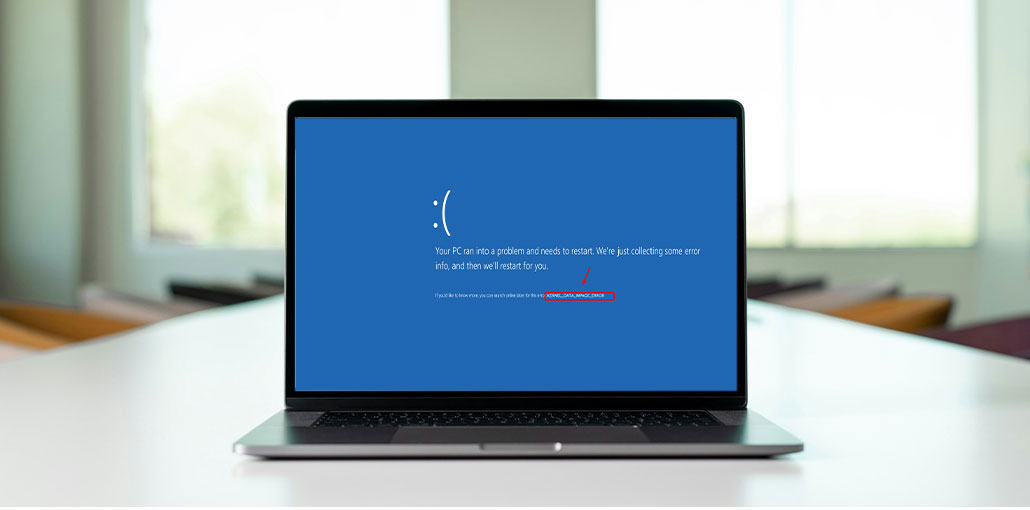
What you would like to experience on your computer is the dreaded BSoD (blue screen of death). That’s how the kernel error inpage occurs. This alarming code indicates that something is wrong with your computer, and it’s best to act now rather than later. You can fix the issue.
What Is the Kernel Data Inpage Error and What Causes It?
The name itself doesn’t provide much information. Stop code “kernel data inpage error” generally refers to hardware malfunctions, such as memory or a hard drive. But, it could also be caused by damaged system files, poor BIOS settings, or motherboard issues, and even viruses. None of these is positive for your computer. Therefore, it’s important to start troubleshooting when you see the error for the first time.
Sometimes, you’ll encounter the error once, and it doesn’t show up again. This is usually due to a temporary problem with your RAM or high usage for a long time. If you’re straining your system, you may not have any serious issues with your system. Always back up your system after getting the stop code warning: kernel data inpage error, just in case
Kernel Data Inpage Error Status Codes
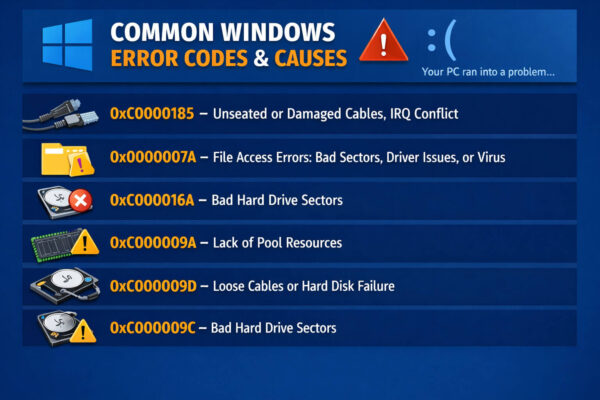
In addition to seeing the KERNEL_DATA_INPAGE_ERROR stop code on the BSoD, you might see a status code, which helps narrow down possible causes. The codes are:
If you don’t receive a code or your system was rebooted, and you wrote your status code, do not be concerned. If your computer starts again, click Win + X and select Event Viewer. Go to Start and search for Event Viewer.
Right-click any section in Windows Logs or Application and choose Search. Find kernel data inpage. Most of the time, you’ll see the error in Windows Logs under System.
Also read: How to Fix Windows Update Errors in Windows 10
How to Fix a Kernel Data Inpage Error
Whether you have any status codes or not, there are various troubleshooting actions you can use to resolve the kernel data inpage error. Before taking any other action, make sure you back up all your personal data. If there’s a hard drive failure, your system may crash at any time.
Try These Quick Fixes First
If you’re lucky enough, fixing the problem could only take some minutes, and you’ll find no issues on your system. Before you take any other troubleshooting, consider these quick solutions:
- Restart your PC. If you experience a random glitch, high resource usage, or an update to a system driver could be the reason. Restarting your PC clears the system.
- Check hardware. Turn off your computer, unplug the power cable, then transfer your computer to an area with low dust or static. Verify that all cables are connected and that the memory modules are seated. Check for damage to the pins on your cables and even your memory modules. If you’re using a laptop, read the manual before opening it.
- Uninstall recently added software or drivers. Drivers and software can hurt your system in many ways, such as creating corrupted or damaged files and BSODs. If you encounter an error when uninstalling the software, then it’s not the cause. If you don’t see the error, then the driver or software isn’t compatible with your system.
- Disconnect the recently installed hardware. You should receive the error in a few days after installing the new hardware. But faulty hardware, damaged cable, bad drivers, or a wrong installation can all trigger the error. Try restarting without the hardware if possible. You can also disconnect and reconnect it to check whether the issue persists.
- Run a full virus scan. Check your system to see if your PC is affected. You can also use Windows Security or anti-virus software.
2. Enable Automatic Paging File Size
If there is a problem with the data in the page file and virtual memory, you receive the kernel data inpage BSoD. The easiest and simplest solution is to turn on Automatically manage paging file size for all drives.
Start File Explorer and right-click on the PC. Choose Properties. Then, open the Advancedtab and choose the Settings in the section called “Performance.
Go to your Advanced tab in the next window. Select Change, and then check to automatically manage the paging file size for all drives, and then select OK at each screen to exit.
If this is on already, try disabling it and check if the issue is solved.
3. Scan Your Hard Drive
If it’s a drive issue, you can scan and correct certain errors using chkdsk in a command prompt or using the Error Checking tool (similar to chkdsk but in a visual format). It’s simpler to use the Error Checking program for most users.
Start File Explorerand select this PC. Right-click the hard drive and choose Properties. Select the Tools tab, then select “check”.
It is important for Windows 10 and 11 that the drive health is automatically monitored. This means that you may see a message that says the drive shouldn’t be inspected. But, it’s recommended to check the Error Checking tool to be sure. Select “Scan Drive” to start the scan.
If you get an error message telling you that the scan cannot run when using the drive, schedule the scan to run the next time you restart when prompted, and reboot the PC.
You can choose for the program to fix any mistakes it discovers. Allow it to continue.
To use commands, you could also employ the chkdsk command to identify errors. Open Start and start typing the command. Choose the Run As Administrator optionunder the Command Prompt.
Type the command chkdsk/fto locate and fix any problematic sectors, if possible.
You may need to restart your computer for the scan to begin.
If either tool succeeds in resolving errors, it will fix the problem with the kernel data inpage error.
Also read: How to Clone Hard Drive to New SSD Without Reinstalling?
4. Run the Memory Diagnostic Tool
If the status code is related to memory issues, you can try using this memory Diagnostic Tool. The built-in Windows tool checks for memory problems. Close all open apps and files before running this program.
Open Start, enter mdsched.exe and click the result. You could also enter the word Memory Diagnostic and choose the results. You can choose to run the scan to restart.
Press F1. When the scans start to run, you can select the type of scan you’d like to run. By default, the Windows Memory Diagnostic tool runs the Standard scan. However, if you’re encountering a kernel data inpage error, it’s recommended to conduct an even more thorough scan. Select Extended from the list.
Press F10 to make the modifications. The scan may take some time, so it’s recommended not to interrupt it.
If any issues are found, the issue appears as a message on your desktop after your computer restarts. They can also be found in the Event Viewer located under Windows logs>System. Select Right Click on System and select Find. Search for MemoryDiagnostic. Go through any of the instances that show the results.
There’s a glitch with the tool that can be encountered at times. In some cases, you won’t receive an error message or see any event in the Event Viewer, particularly when there isn’t any error. In this instance, you can try the memory checking tools of third-party vendors. They are also helpful for more complicated and varied tests.
5. Run the System File Checker
If the issue is due to damaged or missing files, the most effective solution is to use the System File Checker tool. The built-in Windows tool tries to automatically identify and repair damaged or deleted system files. Infections, Windows update issues, software, and bad drivers for devices could all lead to issues with the system files.
Press Win + R and type cmd. Press Ctrl + Shift + Enter to open Command Prompt with administrative privileges. When you are prompted, you will be asked to type SFC scannow And then press Enter and then press Enter. The process could be lengthy, and you should be patient. If there aren’t any errors, it takes more than five minutes to complete.
If nothing is found, you’ll receive an error message that says Windows Resource Protection did not find any integrity issues. If any errors are seen, then you’ll be presented with the details of what was found and whether it can be fixed or not.
6. Update or Reinstall Device Drivers
Drivers for devices that are corrupt or damaged typically cause the kernel data inpage error, which causes the system to see the hard disk, or any other hardware, as failing. The positive side is that there’s no need to replace your hardware; make sure you update your drivers.
Press Win + X and choose Device Manager. Find error icons on any device. If you don’t find anything, you can expand Disk drives. Right-click on your hard drive and select Update driver.
Choose to look for drivers automatically or download a driver on your PC. This option is only available to those who have downloaded a new driver. If Windows can’t find a driver, go to the hardware manufacturer’s website to find the latest driver.
If you have recently installed new hardware or drivers, you may also choose uninstall the device to eliminate drivers from the computer and allow Windows reinstall it if you reboot your computer.
Also read: How to Fix Bluetooth Driver Error on Windows 10
7. Restore Your BIOS
Most users never change their BIOS settings outside of adjusting the boot order. But, any wrong settings or configurations can cause chaos on your PC and can cause the BSoD with a kernel data inpage error. There’s no way to determine if this is the root of the issue without resetting your BIOS back to its default settings. This applies regardless of whether you utilize the standard BIOS or the new UEFI version.
If you’ve got specific settings, make a note before making any adjustments. (You can make your changes in a small amount at a given time to determine whether any of them are the problem.)
Restart your computer, and then press the BIOS button of your system. This will vary based on the system you have, but it is generally F2. It could be F1, F10, or Del . To confirm, check the text that says Press the key to enter the BIOS during startup. It flashes fast, which is why it’s hard to spot, particularly if you’re using an SSD.
When you are in your BIOS, search for a Reset to default option. (The phrase may vary depending on the BIOS you have and the version.) After resetting your BIOS, reboot your computer to check if the problem persists.
FAQs: Kernel Data Inpage Error
What causes Kernel Data Inpage Error in Windows?
The most common causes include a failing hard drive or SSD, defective RAM, corrupted system files, outdated or incompatible drivers, incorrect BIOS settings, and malware infections.
Is Kernel Data Inpage Error serious?
Yes, Kernel Data Inpage Error is a serious issue. It often indicates disk or memory problems that can lead to data loss if not fixed. Backing up important files immediately is strongly recommended.
Can a bad hard drive cause Kernel Data Inpage Error?
Yes, a failing or damaged hard drive is one of the most common causes of Kernel Data Inpage Error. Running CHKDSK or using the Error Checking tool can help identify disk problems.
How do I find Kernel Data Inpage Error logs in Windows?
You can find Kernel Data Inpage Error logs by opening Event Viewer, navigating to Windows Logs → System, and searching for “Kernel Data Inpage Error.”


Leave a comment