

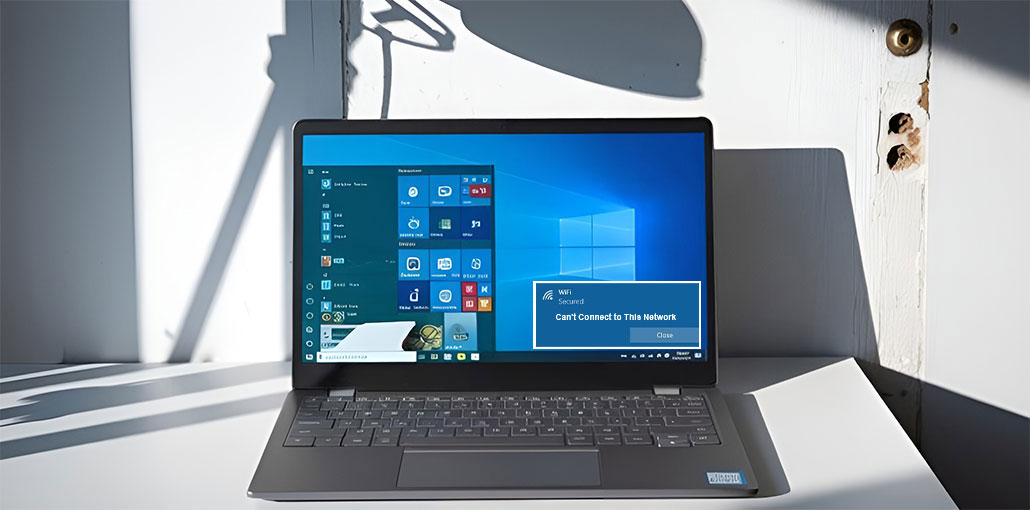
Many people encounter the error “Can’t Connect to this Network” in Windows 10 while connecting to a Wi-Fi network, and it can be frustrating, especially when you require a stable internet connection.
In this guide, I’ve provided a step-by-step method to help you identify and fix the most prevalent reasons for the error “Can’t Connect to this Network” in Windows 10. With these tips, you can quickly restore your network connection and be back online without hassle.
What Does “Can’t Connect to This Network” Mean?
The Can’t Connect to This Network error appears when Windows fails to connect to a Wi-Fi network. This can happen during a new connection attempt or when reconnecting to a previously saved network.
In most cases, the issue is related to:
- Incorrect Wi-Fi credentials
- Corrupted network settings
- Outdated wireless drivers
- Router configuration issues
- Windows network adapter problems
- Interference from antivirus or firewall software
Also read: Solved: WiFi Doesn’t Have a Valid IP Configuration in 7 Easy Steps
How to Fix the Can’t Connect to This Network Error in Windows 10
Here are the most effective ways to solve this “Can’t connect to this network” error in Windows. Step-by-step solutions ranging from simple fixes to more advanced solutions.
1. Restart Your Computer and Router
A simple reboot can fix any temporary issues in your device and the system. This resets network sessions and updates IP assignments.
2. Forget and Reconnect to the Wi-Fi Network
If a system is connected to a network, it will store the credentials for subsequent logins. If the service provider changes any settings, the laptop won’t connect to wifi. If that happens, it is necessary to forget the network and then try to reconnect to it, as it could fix the problem.
- Press Windows + I to open Settings.
- Select Network & Internet.
- Click Wi-Fi.
- Select Manage Known Networks.
- Choose the Wi-Fi network causing the issue.
- Click Forget.
- Return to the Wi-Fi list.
- Select your network and click Connect.
- Enter the correct Wi-Fi password.
You must now search for the network and the available connections. Then try to log in with your credentials again to connect to the network.
3. Enable/Disable Airplane Mode
Windows offers its users the option of Airplane Mode. This feature allows users to cut off and deactivate all connections on the system. So, you need to enable Airplane Mode, then disable it to connect to the network successfully.
4. Reinstall Network Adapter Drivers
If the network adapter driver becomes corrupted, Windows may display the Can’t Connect to This Network message. Reinstalling the driver forces Windows to install a clean version, which often restores proper Wi-Fi connectivity and solves Wi-Fi connection problems.
- Press Windows + X and select Device Manager.
- Expand Network Adapters.
- Right-click your wireless adapter.
- Select Uninstall Device.
- Check Delete the driver software if available.
- Click Uninstall.
- Restart your computer.
- Windows will automatically reinstall the network adapter driver.
5. Reset Network Settings
A network reset removes all network adapters and restores networking components to their default state. This method is particularly useful when incorrect settings, software conflicts, or configuration errors cause the Can’t Connect to This Network problem.
- Open Settings.
- Go to Network & Internet.
- Select Advanced Network Settings.
- Click Network Reset.
- Select Reset Now.
- Confirm the action.
- Restart your computer.
- Reconnect to your Wi-Fi network.
6. Run Network Troubleshooter
Windows provides its users with the Network Troubleshooter. This Network Troubleshooter not only allows users to identify errors that occur when connecting to a network but also fixes the issue.
- Open Settings.
- Click System.
- Select Troubleshoot.
- Click Other Troubleshooters.
- Find Network and Internet.
- Click Run.
- Follow the on-screen instructions.
- Apply any recommended fixes.
7. Run Network Adapter Troubleshooter
The Network Adapter Troubleshooter focuses specifically on wireless and Ethernet adapters. Running this tool can help identify hardware or driver-related problems that prevent your computer from connecting to available networks.
- Open Settings.
- Navigate to System > Troubleshoot > Other Troubleshooters.
- Locate Network Adapter (Windows 10 users can access it through Additional Troubleshooters).
- Click Run.
- Select your Wi-Fi adapter.
- Allow Windows to scan for issues.
- Apply the suggested fixes.
- Restart your PC if prompted.
Also read: Top 4 Tips to Secure Your WIFI Network
8. Temporarily Disable Security Software
Some antivirus programs, firewalls, and VPN applications can interfere with Wi-Fi authentication. Temporarily disabling these tools can help determine whether security software is responsible for the Windows 11 Can’t Connect to This Network error.
9. Add a Wireless Connection Manually
Windows offers users an option to add connections to connect the device. Follow the steps in the following article to add a manual connection and fix the “can’t connect to this network error :
- Open Control Panel.
- Select Network and Sharing Center.
- Click Set up a new connection or network.
- Choose Manually connect to a wireless network.
- Click Next.
- Enter the network name (SSID).
- Select the correct security type.
- Enter the Wi-Fi password.
- Click Next and then Connect.
10. Disable IPv6
Although IPv6 is supported by Windows, some routers and network environments may experience compatibility issues. Temporarily disabling IPv6 can help determine whether it is contributing to the WiFi Can’t Connect to This Network error.
- Press Windows + R.
- Type ncpa.cpl and press Enter.
- Right-click your Wi-Fi connection.
- Select Properties.
- Uncheck Internet Protocol Version 6 (TCP/IPv6).
- Click OK.
- Restart your computer.
- Try reconnecting to the network.
12. Change the Channel Width for Your Network Adapter
You can fix this error by changing the channel on the device connected to the internet. Follow the steps to change the width of your channel for your network adapter.
- Press Windows + X and open Device Manager.
- Expand Network Adapters.
- Right-click your Wi-Fi adapter and select Properties.
- Open the Advanced tab.
- Locate Channel Width or 802.11 Channel Width.
- Change the value to Auto or another available option.
- Click OK.
- Restart your computer.
- Reconnect to your Wi-Fi network.
Also read: WiFi Connected But No Internet? 7 Easy Fixes for All Devices
13. Reset TCP/IP and Flush DNS
Corrupted TCP/IP settings or DNS cache data can interfere with network communication. Resetting these components refreshes Windows networking services and often fixes persistent Can’t Connect to This Network errors.
- Type Command Prompt in Windows Search.
- Right-click Command Prompt and select Run as Administrator.
- Run the following commands one by one:
netsh winsock reset
netsh int ip reset
ipconfig /flushdns
ipconfig /release
ipconfig /renew - Restart your computer.
- Try connecting to the Wi-Fi network again.
How to Prevent the Can’t Connect to This Network Error
To reduce the chances of seeing this error again:
- Keep Windows updated.
- Regularly update network drivers.
- Restart your router periodically.
- Remove unused Wi-Fi profiles.
- Avoid installing conflicting networking software.
- Use strong but compatible router security settings.
Conclusion
This article explains the “Can’t connect to this network” error, the most common causes, and provides solutions to fix the problem. The guide is built on Microsoft’s official documentation and hands-on testing on Windows 10 and Windows 11, and real-world troubleshooting methods to ensure the solutions are effective.
FAQs about the ” Can’t Connect to This Network Error
Why does Windows keep saying Can't Connect to This Network?
This usually happens because of corrupted Wi-Fi profiles, incorrect passwords, outdated drivers, or router-related issues.
Can outdated drivers cause the Can't Connect to This Network error?
Yes. Outdated or corrupted network adapter drivers can prevent your computer from communicating properly with the router and may trigger connection errors.
Is the 'Can't Connect to This Network' error common in Windows 11?
Yes. The error can occur in both Windows 10 and Windows 11 and is typically related to network settings, drivers, or router configuration problems.
What is the fastest way to fix the 'Can't Connect to This Network' error?
The quickest fixes are restarting the router, forgetting and reconnecting to the network, updating the Wi-Fi driver, and running the Network Troubleshooter.







Leave a comment