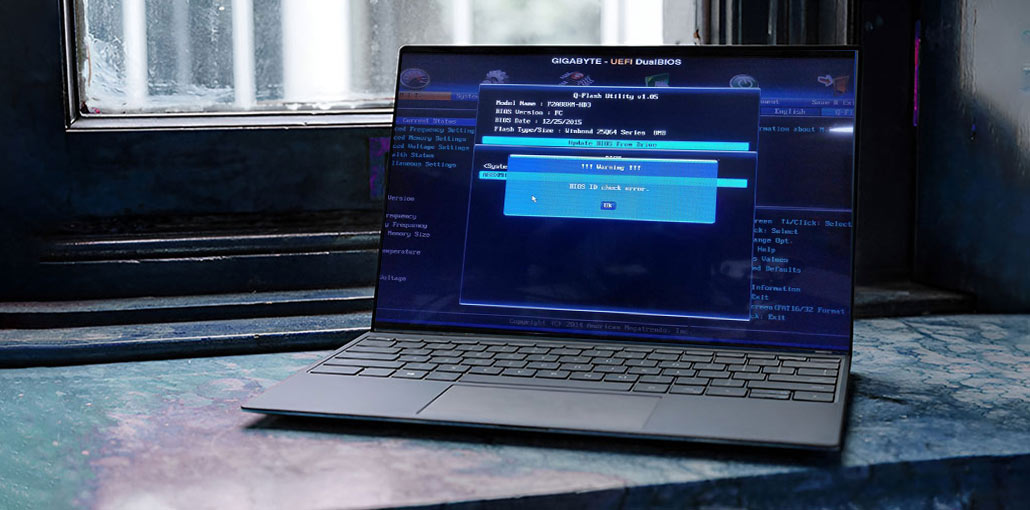
If you are updating your BIOS and you receive the BIOS ID Check error message, here’s how you can fix the problem. While this particular error message is displayed on a Gigabyte motherboard, you can use the same steps even if you are using an alternative motherboard.
What is a BIOS ID Check Error?
Basic Input/Output Systems, or BIOS, are among the most basic items you need to operate a computer. It doesn’t matter which motherboard or operating system you choose; your hardware always comes with BIOS. BIOS runs via firmware that must be upgraded if the manufacturer releases new versions.
Common Causes of BIOS ID Check Error
Updating the BIOS firmware isn’t an issue. Sometimes you may encounter certain problems, such as a BIOS ID check error. There are many reasons for this error, and here we discuss the most common causes.
- Incorrect BIOS Version
- Different Motherboard Revision
- Manufacturer Restrictions
- Corrupted BIOS File
- OEM vs Retail Mismatch
Also read: Windows Script Host Error: Proven Fixes for Windows 10 or 11
How to Fix BIOS ID Check Error on Windows PC
To fix the BIOS ID check error on a Windows PC, follow these steps:
1. Download the Correct BIOS Version.
It’s the most important thing you should know when updating your BIOS firmware. There could be two computers in your residence, and their motherboards may differ. In such cases, you must identify your motherboard to download the right firmware version.
It’s fairly easy to determine what motherboard you have. It is possible to open the Terminal and type this command:
wmic baseboard get product, Manufacturer, version,serialnumber
You can also access your System Information Panel to get similar information.
Once you have your serial number and model, visit the official site to download the firmware.
2. Reset BIOS
Resetting the BIOS to default settings can help you get rid of certain compatibility issues. This method can be effective. Let’s try it.
- Restart your computer, and then repeatedly press ESC / F1 / F2 / F8 or F10 during the initial startup process to access the BIOS menu.
- Click the Windows + I buttons to open the Settings app, and then click on System>Recovery>Advanced startup. Go to Troubleshoot> Advanced Options > UEFI Firmware Settings and then click to Restart.
- When you’re in the BIOS menu, hit F9 to make the Load Default Options dialogue box.
- Choose Yes by using the Arrow keys to reset BIOS settings back to the factory default.
- Close the system and restart it, and then check for any changes.
3. Change the BIOS Boot Mode
Some users claimed that a BIOS update ID check error could be resolved by changing their BIOS boot mode. Let’s give it a go.
- Enter BIOS, as we have mentioned above, and go to the Boot or Security tab.
- Change the BIOS default booting mode from UEFI to legacy. After that, you can activate Secure Boot. Secure Boot choice.
- Press F10, then enter the key to store the changes and close the application.
4. Reset CMOS
The CMOS memory is a tiny amount of memory located on the motherboard of a computer that holds the Basic Input/Output BIOS settings. If you’re still struggling with a BIOS ID check error after updating your BIOS, you can clear the CMOS. This can help restore the boards and reset the BIOS settings to the default. Be careful, as improper operation could damage your PC or BIOS.
- Shut down your computer completely.
- Unplug the power cord and then remove the battery, if it’s for a laptop.
- Press the power button for 60 seconds to completely drain your PC.
- Open the PC case and then touch the metal surface to discharge static electricity.
- Remove the CMOS battery; it should be a standard 3V pocket watch battery.
- You should wait some time before putting it back in place.
- Switch on your PC and watch for any changes.
5. Update BIOS Using a Bootable USB
One possible reason for this Gigabyte BIOS ID check error could be a damaged USB flash drive. In addition, the BIOS update needs a USB formatted to FAT32. It’s therefore necessary to verify for errors
- Download the correct file from your motherboard’s official site
- Format it to FAT32 and copy the BIOS file
- Restart and press F2 / DEL / ESC to access BIOS.
- Use the motherboard’s built-in update tool.
- Choose the BIOS file from the USB and start the update.
- Wait for the restart. Do not turn off your PC; it will restart automatically
Also read: How to Fix Windows Update Errors in Windows 10
6. Upgrade Your Motherboard
If you’ve tried everything above, but still get a BIOS ID check error, you might need to upgrade the motherboard. Over time, your system will begin to weaken and wear and tear, or be damaged by a power surge or other reason.
However, it’s not always as straightforward as it seems. The first problem is that not all motherboards work with the specific model PC however, if you search hard enough, you’ll be able to find a compatible model.
Final Remarks
We’re sure we’ve looked at the various ways to resolve the BIOS ID check error. There are many reasons other than those listed above. Please let us know about it below in the comments, and how you can fix it.
FAQs: BIOS ID Check Error
Can I force the BIOS update despite the ID Check Error?
It’s not recommended. Forcing an incompatible BIOS can permanently damage your motherboard. Always use the correct BIOS file and follow official procedures.
Do I need to reset CMOS to fix BIOS ID Check Error?
Resetting CMOS is often effective because it restores BIOS settings to default, clearing conflicts that may prevent updates.
Can I fix BIOS ID Check Error without a USB drive?
Some motherboards allow direct BIOS updates via the built-in BIOS utility or manufacturer software in Windows, but using a properly formatted USB is generally the safest and most reliable method.
How do I check my current BIOS version?
Press Windows + R, type msinfo32, and press Enter. Look for BIOS Version/Date in the System Information window. Alternatively, check BIOS/UEFI setup during startup.


Leave a comment